Joey Resin Toy Behind The Scenes
This project was a labor of love. Lots of time went into making my dream of creating a toy a reality. I’m very proud with how this art piece turned out.
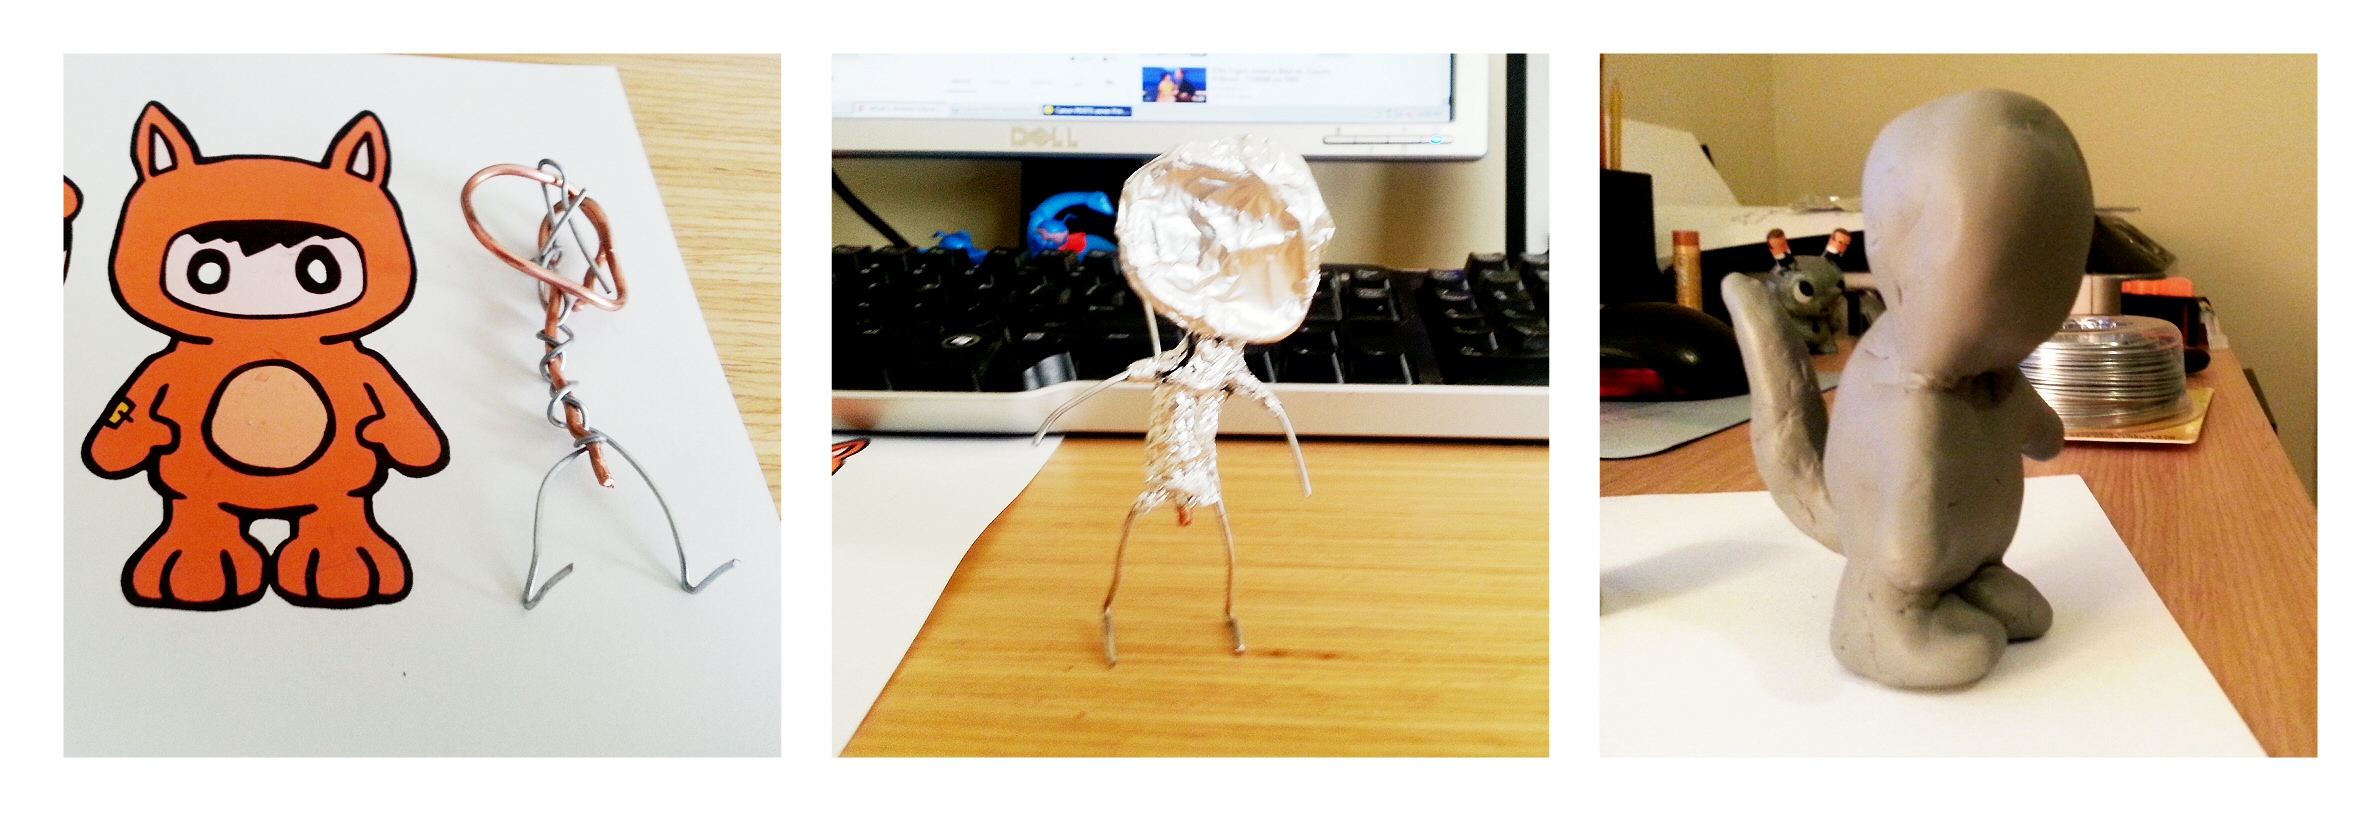
The first step in making the toy was creating the clay sculpt. I’m no expert in sculpting. Nevertheless, that was not going to hold me back from making a toy. Since it had been years since I even tried to sculpt anything and did not know sculpting techniques I did a lot of research. I was reading, watching tutorials online, and practicing. There are lots of really great sculptors out there with time-lapse videos of their work. There are also resin toy makers who have blogs and post about works in progress. All of this creates some great learning material!
I used copper wire, frame hanging wire, and some tin foil to make the base of the body. Then I began layering clay over top of the wire and tin foil. One thing I would do differently is wrap more tin foil around the character, especially the arms and tail.
To create Joey’s face inside the mask I added a few different layers of clay. First his hair was cut out and placed in the right spot. Then his kangaroo hood was added in.

It took a long time to get his shape right and to make him as smooth as I wanted. I would work on the sculpture on and off for weeks. As he came together more detail was added. I was able to add ears and arms, and make the feet look similar to the drawing.
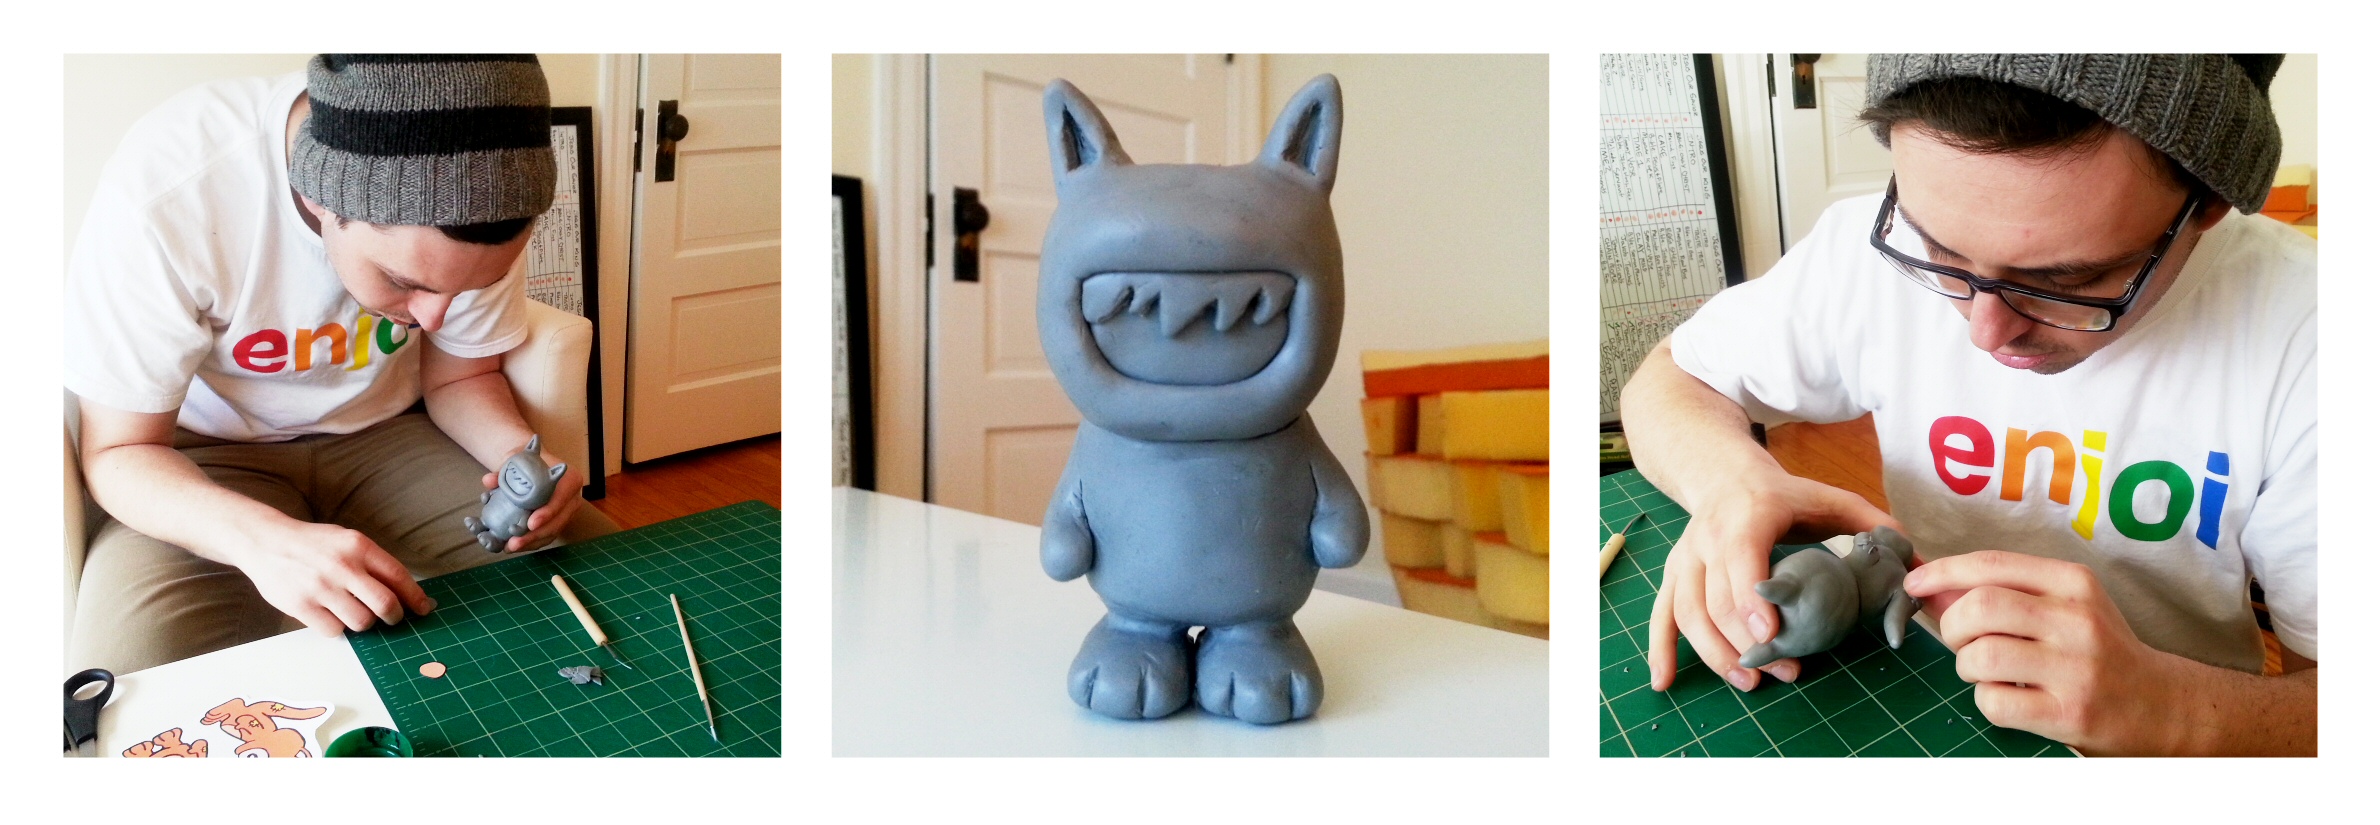
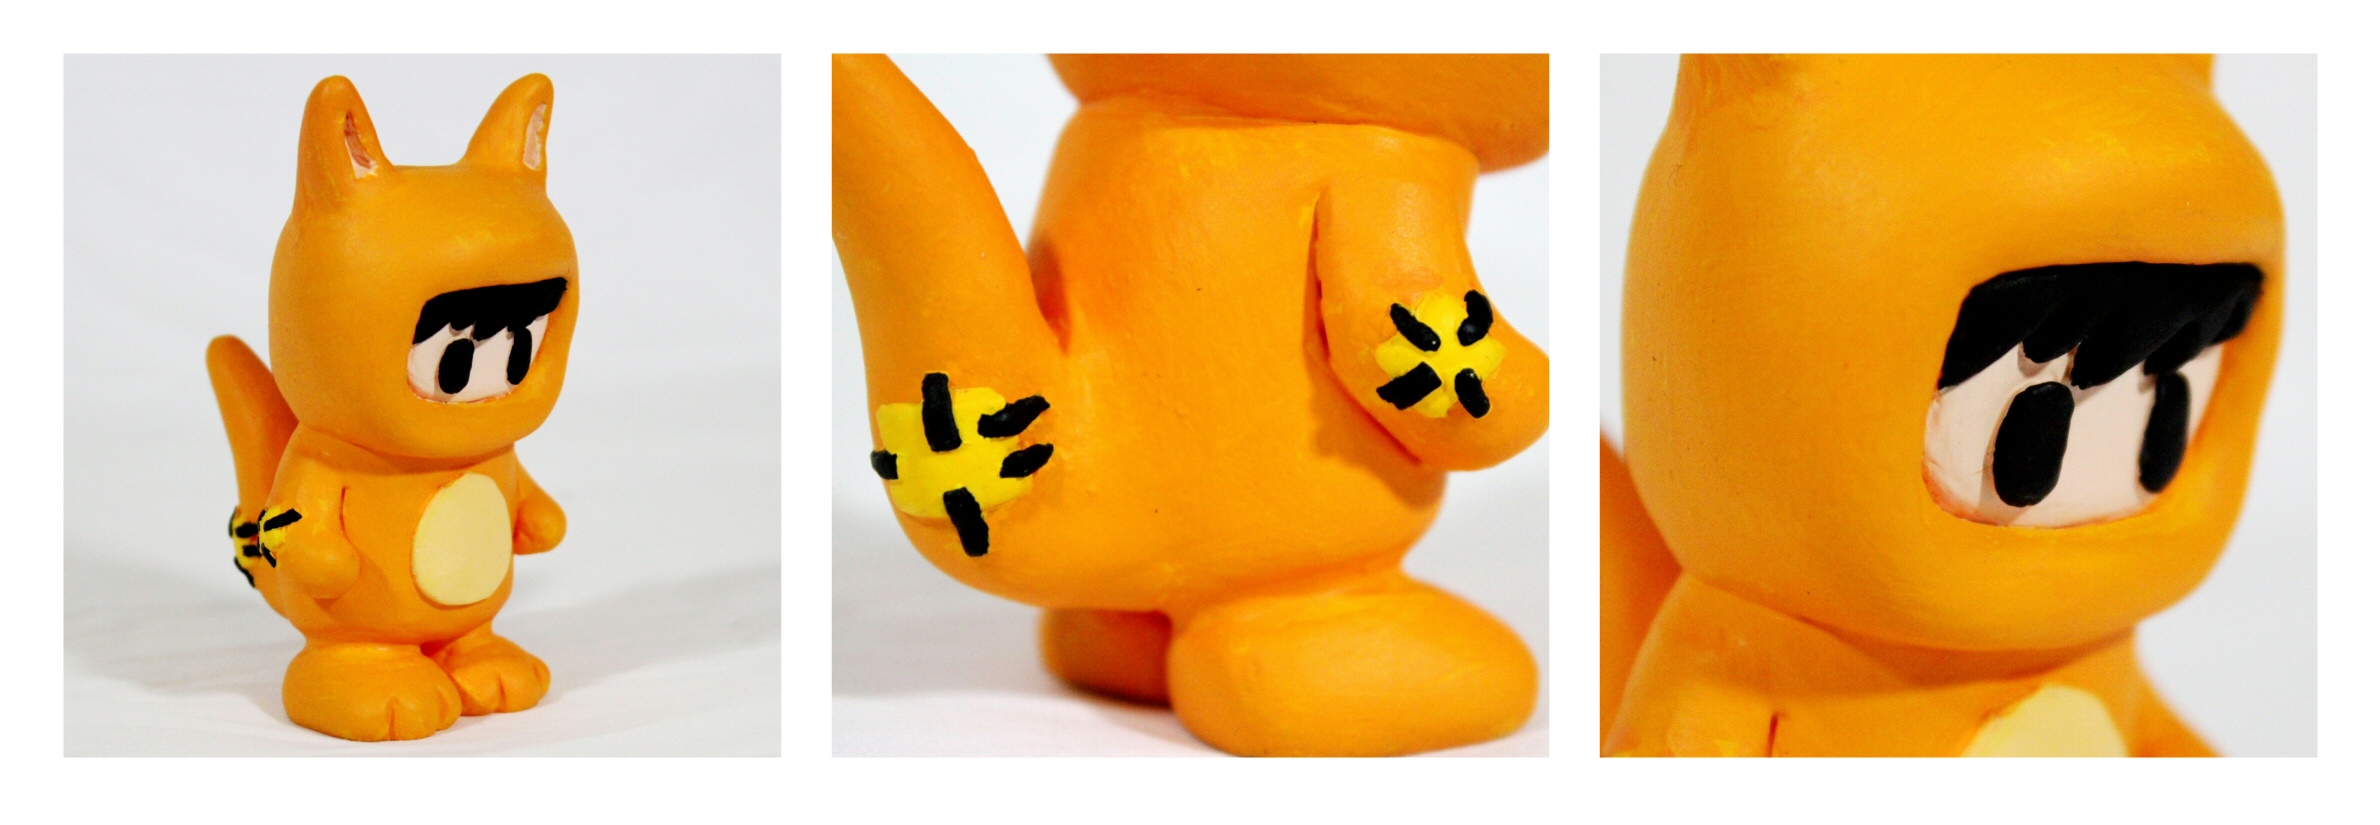
Some of the last bits to be added were the patches, stitching, and his eyes. Then I used clay softner and a paintbrush to smooth him out and take out lots of his imperfections and get him looking the best possible.
Since I worked with Super Sculpey, I could bake him at home using the oven. Once baked, I sanded him, patched him up, and baked him again. By this point, about a month had passed since first working on the sculpt.

For around eleven months the finished sculpt stood on my desk. I had to learn how to make the silicone mold and cast resin. From reading through numerous blogs, I knew there was a risk of breaking the sculpt during the mold making process. I created a dummy version of Joey really quickly, just to use for a test silicone mold. I wanted to ensure that the Joey I spent hours and hours crafting wasn’t going to be compromised until I could master making a mold.
This was a good call, because the first mold did not go so well. Not enough mold release was used and it ended up as one big block of silicone. Which in turn broke the test Joey into three pieces!
Taking some mini figures I had in the office, I created some test molds with them, experimenting with how much mold release would be needed, and even testing out Vasaline as a release agent. Both of these worked. So I hot glued the test Joey back together and created a test mold for him. I wanted to see how the resin would flow into the mold, and where potential air bubbles would be formed and all that jazz. This time around it worked.
Finally it was time to make the real mold of Joey. I was a little nervous about making this mold, so I took my time. In the end, everything turned out well. The only problem was that Joey’s tail broke when getting him out of the mold. I’ll have to figure out how to fix this for the future when the time comes to make a new mold.

I started making some test pulls, figuring out how the plastic worked and how the mold itself would be to work with. It was awesome pulling the first warm toy out of the mold.
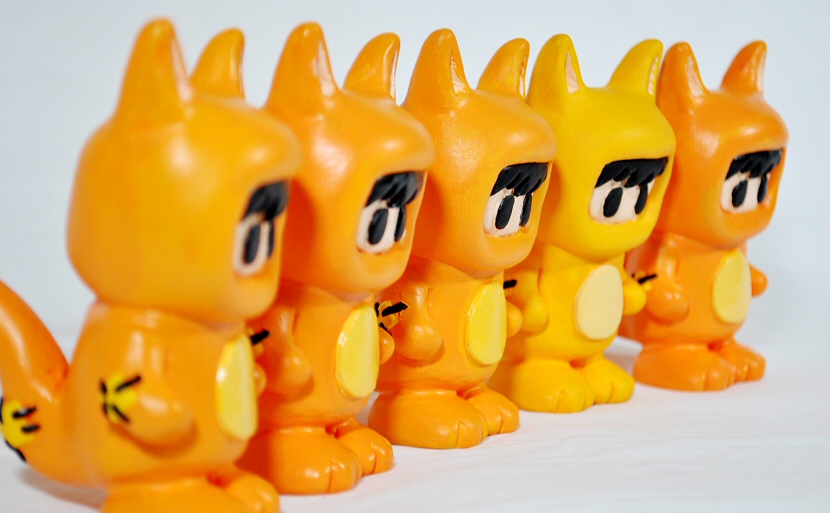
The final hurtle in the creation of Joey was painting him. I didn’t realize that using mold release would make it practically impossible to paint him until I had three pulls and was trying to paint one of them. The paint would not stick- no matter how much I washed the resin. I tried priming with everything, including car paint primer, and nothing worked.

So I did more research and came across powder molding. With this information in hand I began using baby powder as the release agent, and Krylon Fusion for plastic as a base coat. It worked!
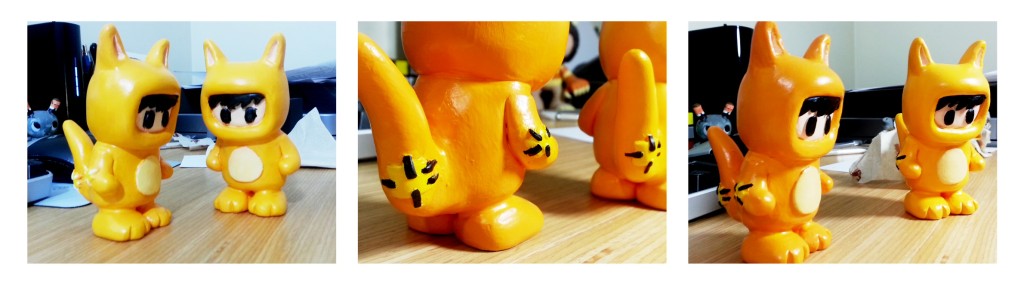
Lastly was the process of painting by hand all the details in Joey. It was a lot of fun mixing up some custom colors and watching him come to life! It was a painstakingly slow process, but well worth it to see the finished toy. After each resin figure was finished being painted I would seal them by spraying multiple coats of clear matte lacquer.
That was the end of my thirteen month journey, fulfilling a lifelong dream. I have more resin figures on the way and I hope to continue exploring this art form for years to come.
Joey makes a great addition to any indie toy enthusiast’s collection.
If you have any questions about making resin toys or any thing relating to art- hit me up in the comments section or shoot me an email.
-Adrian